


The radio controller with a range of up to 1 km
The Long Range Controller described below is a long-range robot remote control based on the Arduino Nano.
Questo utile strumento per controllare a distanza il robot è stato da me ideato per essere facilmente realizzato con gli stessi materiali del robot PEDRO, multistrato e plexiglass, con l’aggiunta di alcuni segmenti di un profilato in alluminio, alcune viti M3, M6 e M8, 1 mini-box per Modulo nRF24L01+ con convertitore seriale, antenna WiFi 2,4GHz Long Range e modulo di potenza addizionale, 2 moduli joystick, 2 potenziometri, 4 pulsanti momentanei, un modulo LCD a 4 righe x 20 caratteri con modulo I2C, 3 switch ON-OFF, un portabatterie a 2 vani, e 2 batterie tipo 18650.
First, download and print the following PDFs, which will guide us in cutting the 8mm-thick plywood elements, the same type already used to build the PEDRO robot's chassis.
Click the following dimensioned drawing and download the 1:1 scale PDF drawing of the remote control's side panels.

Now do the same for the drawing of the remote control's base:

Once the cutting and drilling of the remote control's side panels and base are done, finish the edges with fine-grit sandpaper.
At this point all that's left is to glue the three pieces together in place with two-part epoxy glue; the final result should look like the following drawing:

From an L-shaped profile measuring 50mm x 50mm x 5000mm, cut three segments: the first one 184mm long, and the other four 50mm long each.


Once you've cut the segments to the right length, drill them following the diagrams' layout.
At this point all that's left is to fit them into the remote control's chassis like this:
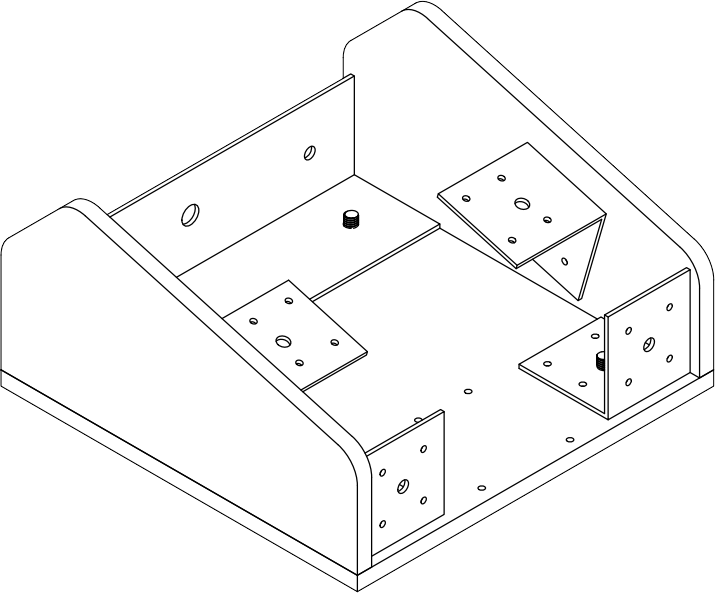
Ora possiamo installare il microcontrollore Arduino Nano con la sua scheda di espansione e il Modulo nRF24L01+ con il suo mini-box. Per fissare la scheda al case ci serviremo di distanziatori esagonali in plastica tipo M3. Procederemo con l’introdurre dal lato inferiore della base le viti a brugola M6 attraverso gli appositi fori realizzati in precedenza.

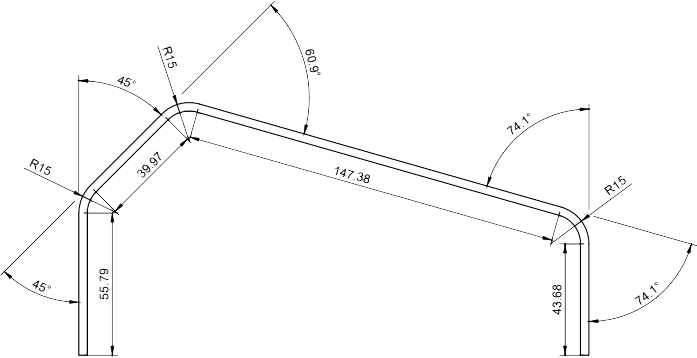
Now let's move on to making the plexiglass cover: cut a strip of plexiglass from our sheet as we did earlier for the robot's cover, and hot-bend it using the plexiglass bender according to the following diagram:
Drill the planned holes into the cover using progressively larger drill bits (hand or drill press) until you patiently reach the hole's final diameter — don't rush, or you risk cracking the plexiglass sheet. Step drill bits are recommended for this task. Finish the job with a file and fine-grit sandpaper.
The final result should look like this:

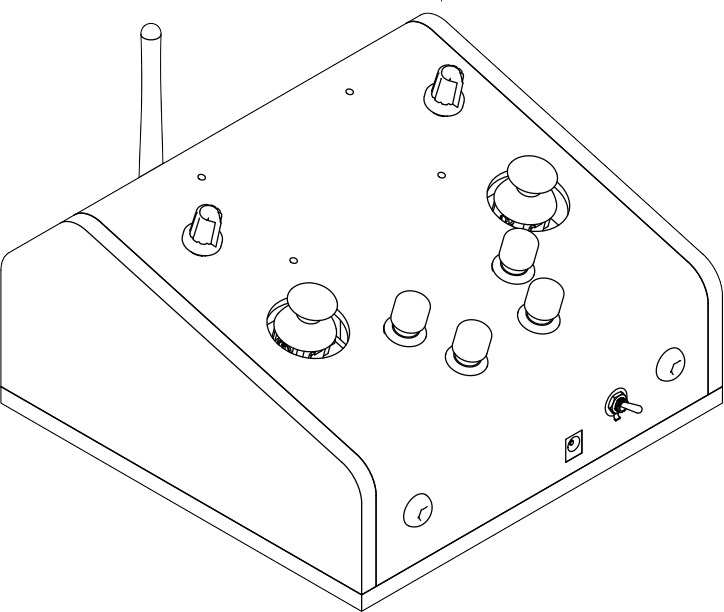
Infine installiamo i potenziometri, i moduli joystick, i pulsanti momentanei, gli switch, ed infine le viti per fissare la cover di plexiglass al case del radio-controller. Questo è l’oggetto completamente assemblato:
All that's left is to finish up with the wiring, which we'll do following the connection diagram shown below.

Infine scarichiamo il firmware cliccando sul pulsante seguente ed eseguiamo il caricamento dello stesso sulla scheda Arduino Nano collegando quest’ultima al nostro PC con l’apposito cavo USB Tipo B.
LONG RANGE CONTROLLER FIRMWARE